Furniture Props
Woodgrain Bench
2024-2025
This bench hadn’t been pulled for a specific show in a long time because of its color. Between shows in our scene shop, I was originally supposed to give it a new paint job, but I realized that the legs needed to be replaced as well. In addition to sanding, priming, painting, and woodgraining the bench, I also laminated pieces of 5/4 lumber but to size on the miter saw and table saw, and then used the oscillating saw to cut out notches for the new legs to slot into the bench’s existing frame. I painted the bench seat and legs separately to get a cleaner woodgrain look, and then attached everything with screws and washers.
-
![An image of the Cultural Center.]()
This is the color the bench was before I began working on it. At this point, I hand sanded the bench to get past the sealer so I could begin painting. When I inspected the bench, I noticed that the legs were old and starting to crack, so I removed them and decided to remake them.
-
![An image of the Cultural Center.]()
For the legs, I laminated pieces of 5/4” lumber to replace the old legs. I cut them down to a little over 17 inches and ripped them on the table saw to a little wider than 3 inches to allow for space to clean up the sides after laminating. I used 3 pieces of 5/4” for each leg, then I used the oscillating saw to cut out a notch to line up to the frame of the bench.
-
![An image of the Cultural Center.]()
While the legs were drying, I painted the seat of the bench and then used wood grain tools to make the woodgrain pattern.
-
![]()
Side view of the completed bench
-
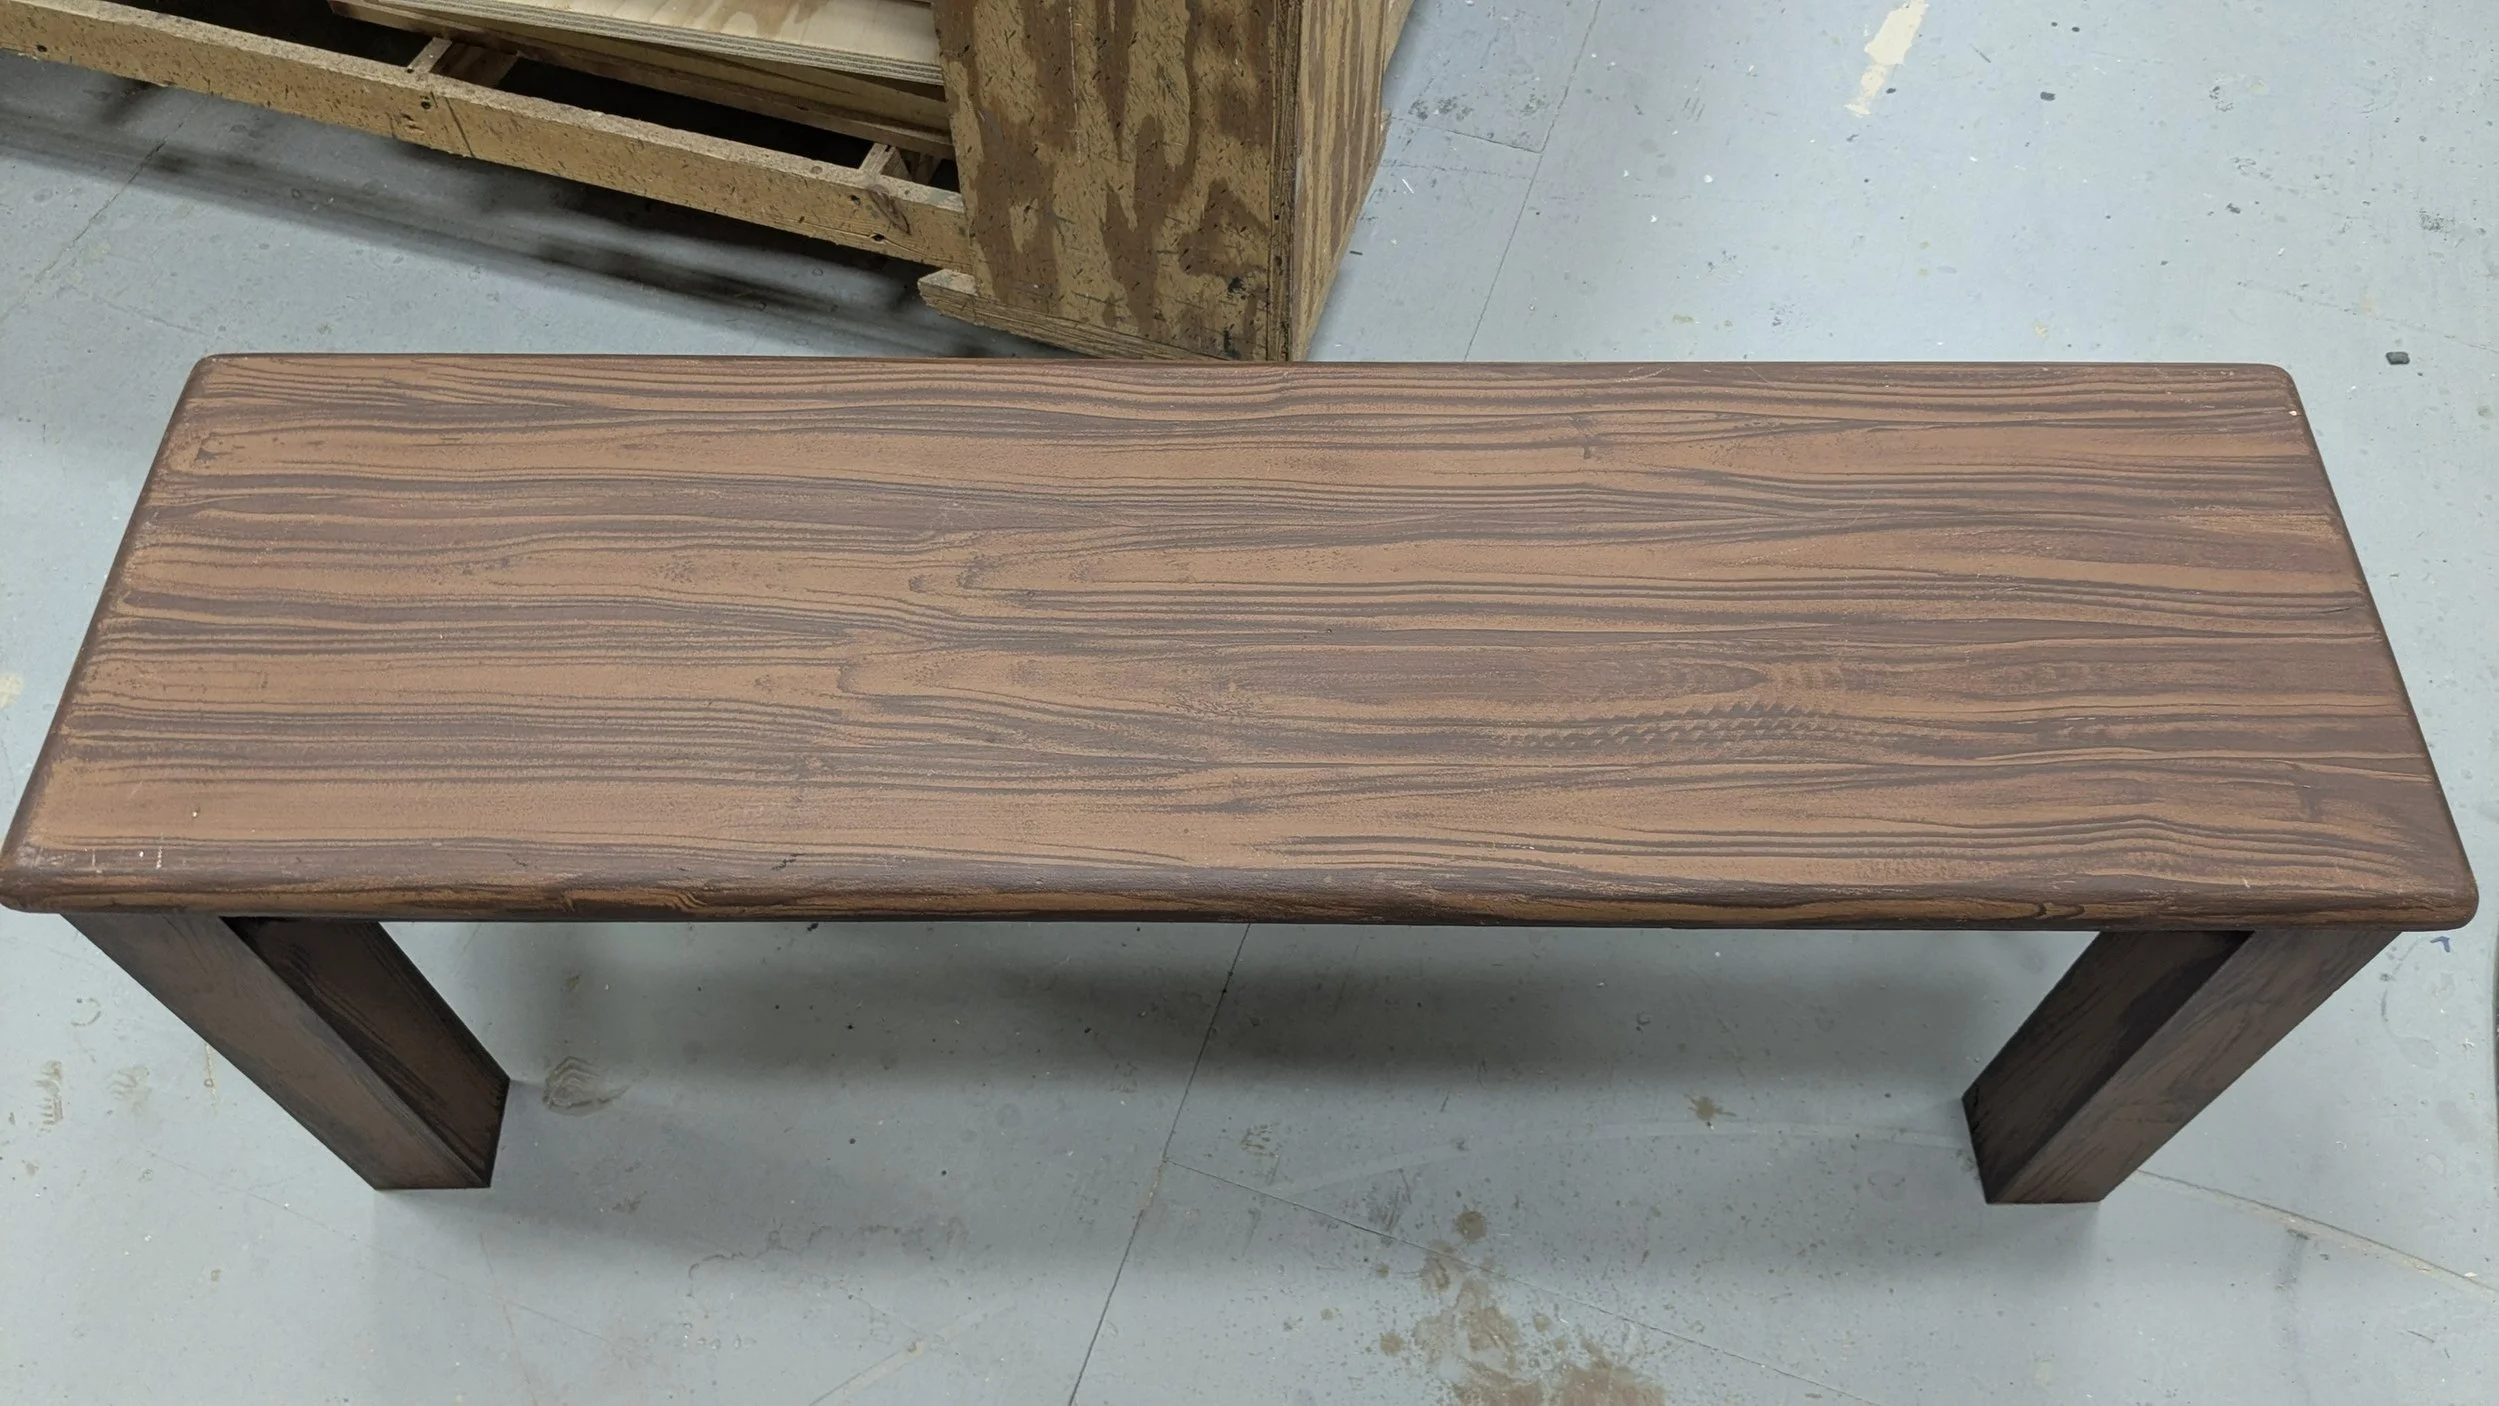
![]()
Top view of the completed bench


Upholstered Chair
2024
This chair was pulled for the GMU School of Music’s Fall Opera, but it wasn’t in good enough shape to be put on stage right away. This piece was a collaborative effort between me and another intern who handled the painting and appliques, while I reupholstered the seat and chair back. I used the panel saw, circular saw, band saw, and belt sander to get the seat cut out and shaped, and then I used the band saw and belt sander to cut out the circular back piece, both out of 3/4” plywood. I used a meat carving knife to cut out the upholstery foam and spray adhesive to attach it to the plywood bases, and then I used an upholstery stapler to attach the fabric, checking the front often to make sure the vertical stripes on the fabric remained as straight as possible. I attached the seat and back cushion with screws, and then placed the back applique to cover up the screw holes.
-
![An image of the Cultural Center.]()
This is a dry fit of the upholstered seat on the chair
-
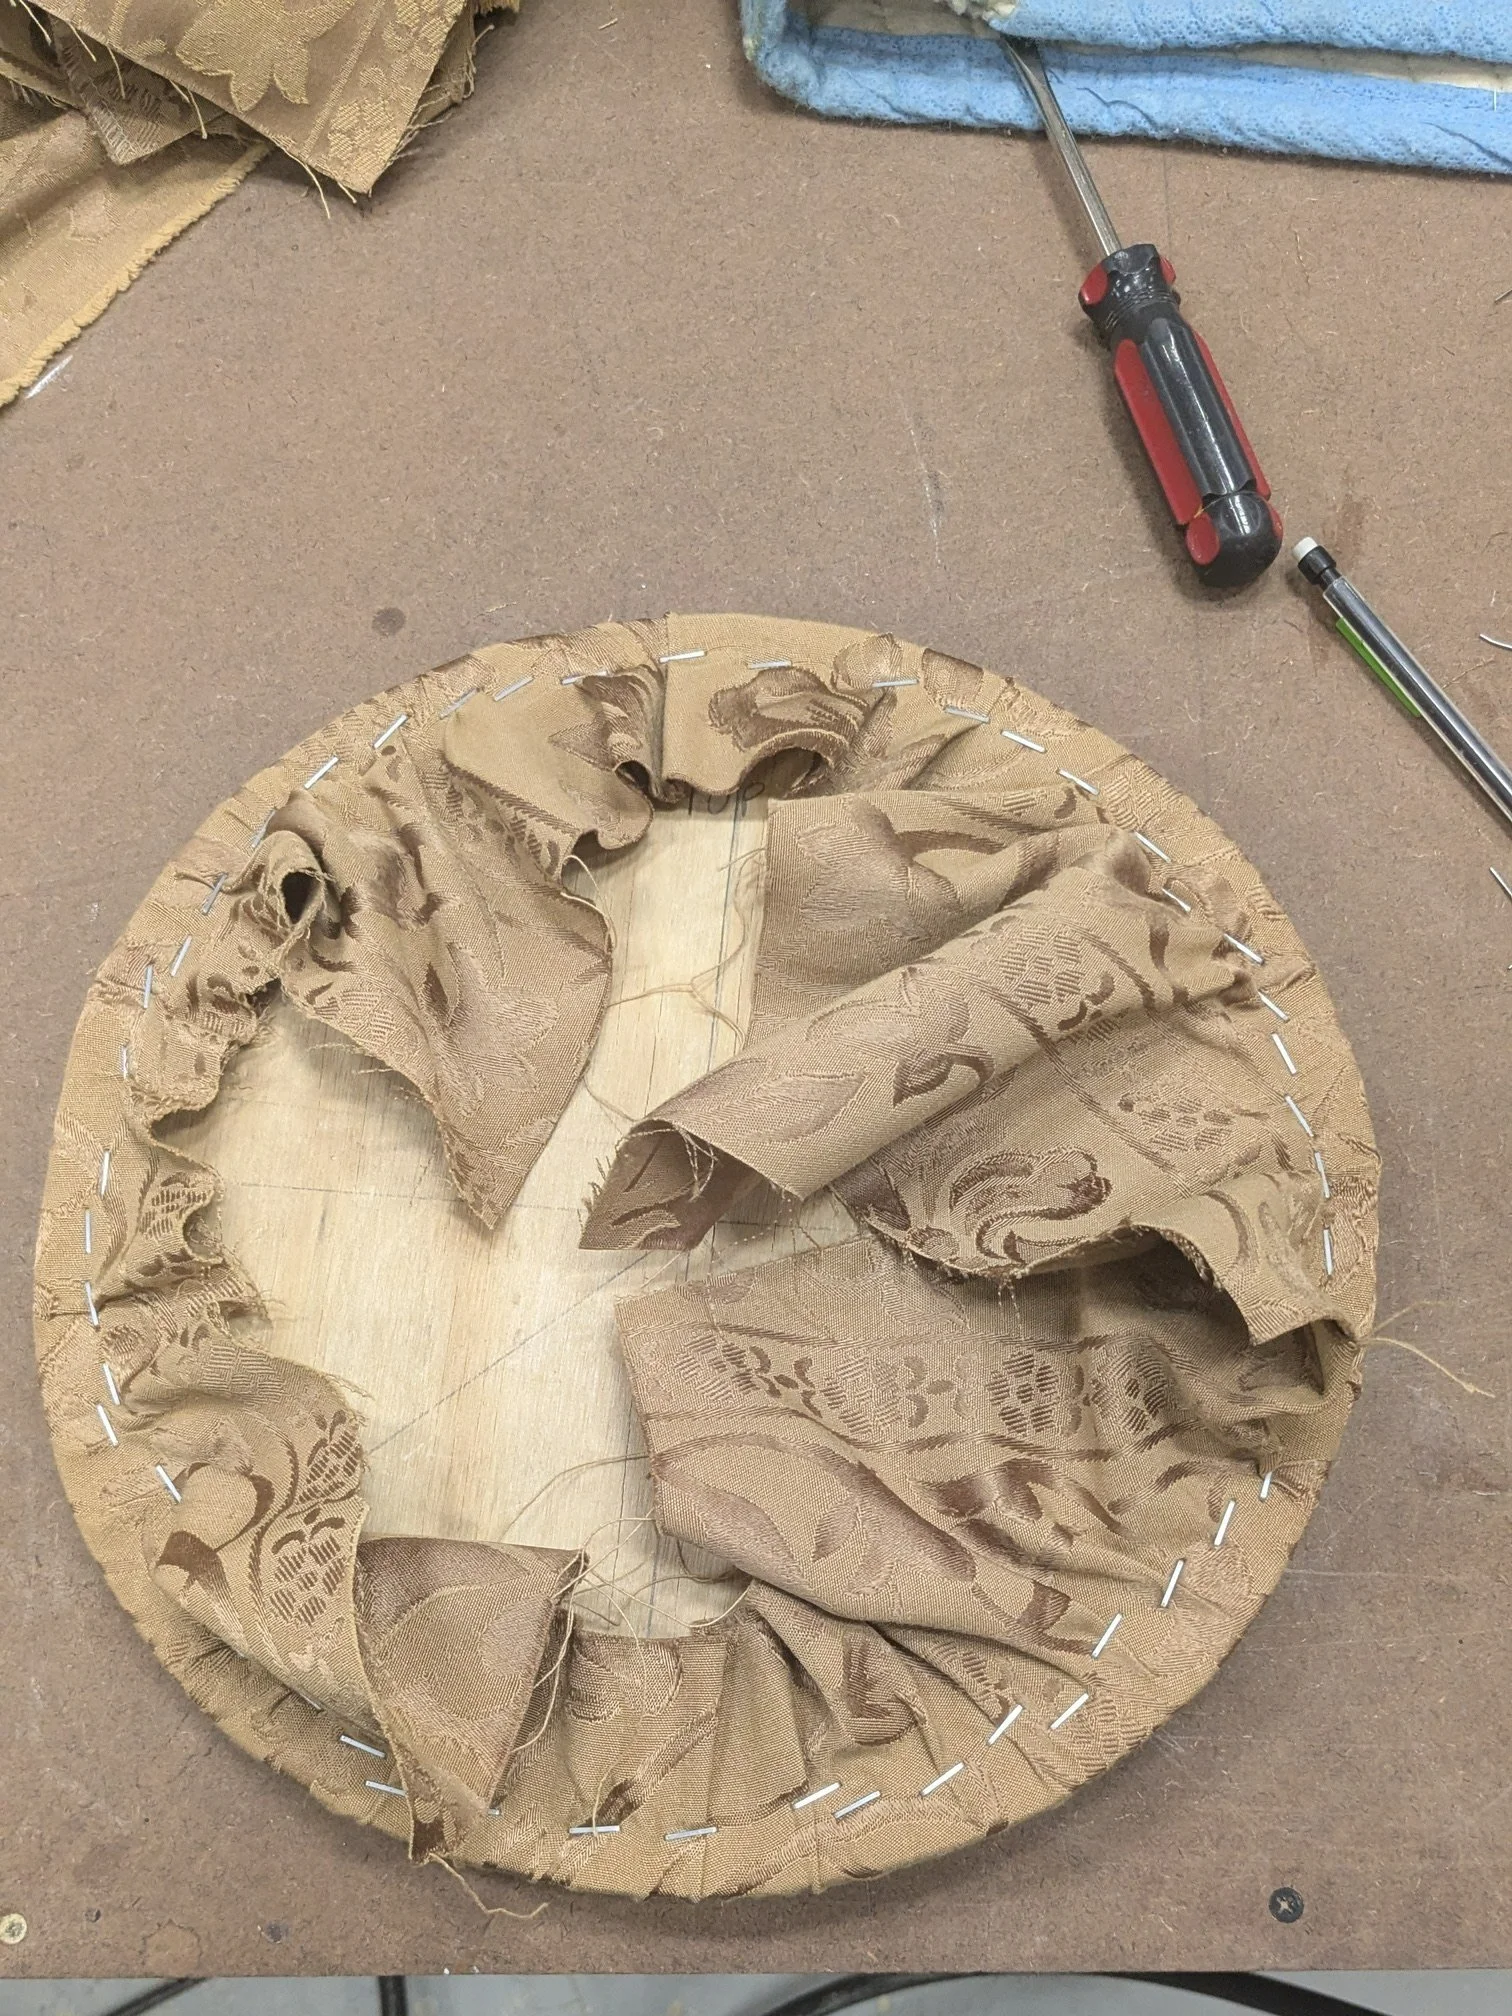
![An image of the Cultural Center.]()
This is the back of the chair’s backpiece once the fabric was all stapled down, but the excess was not cut off yet
-
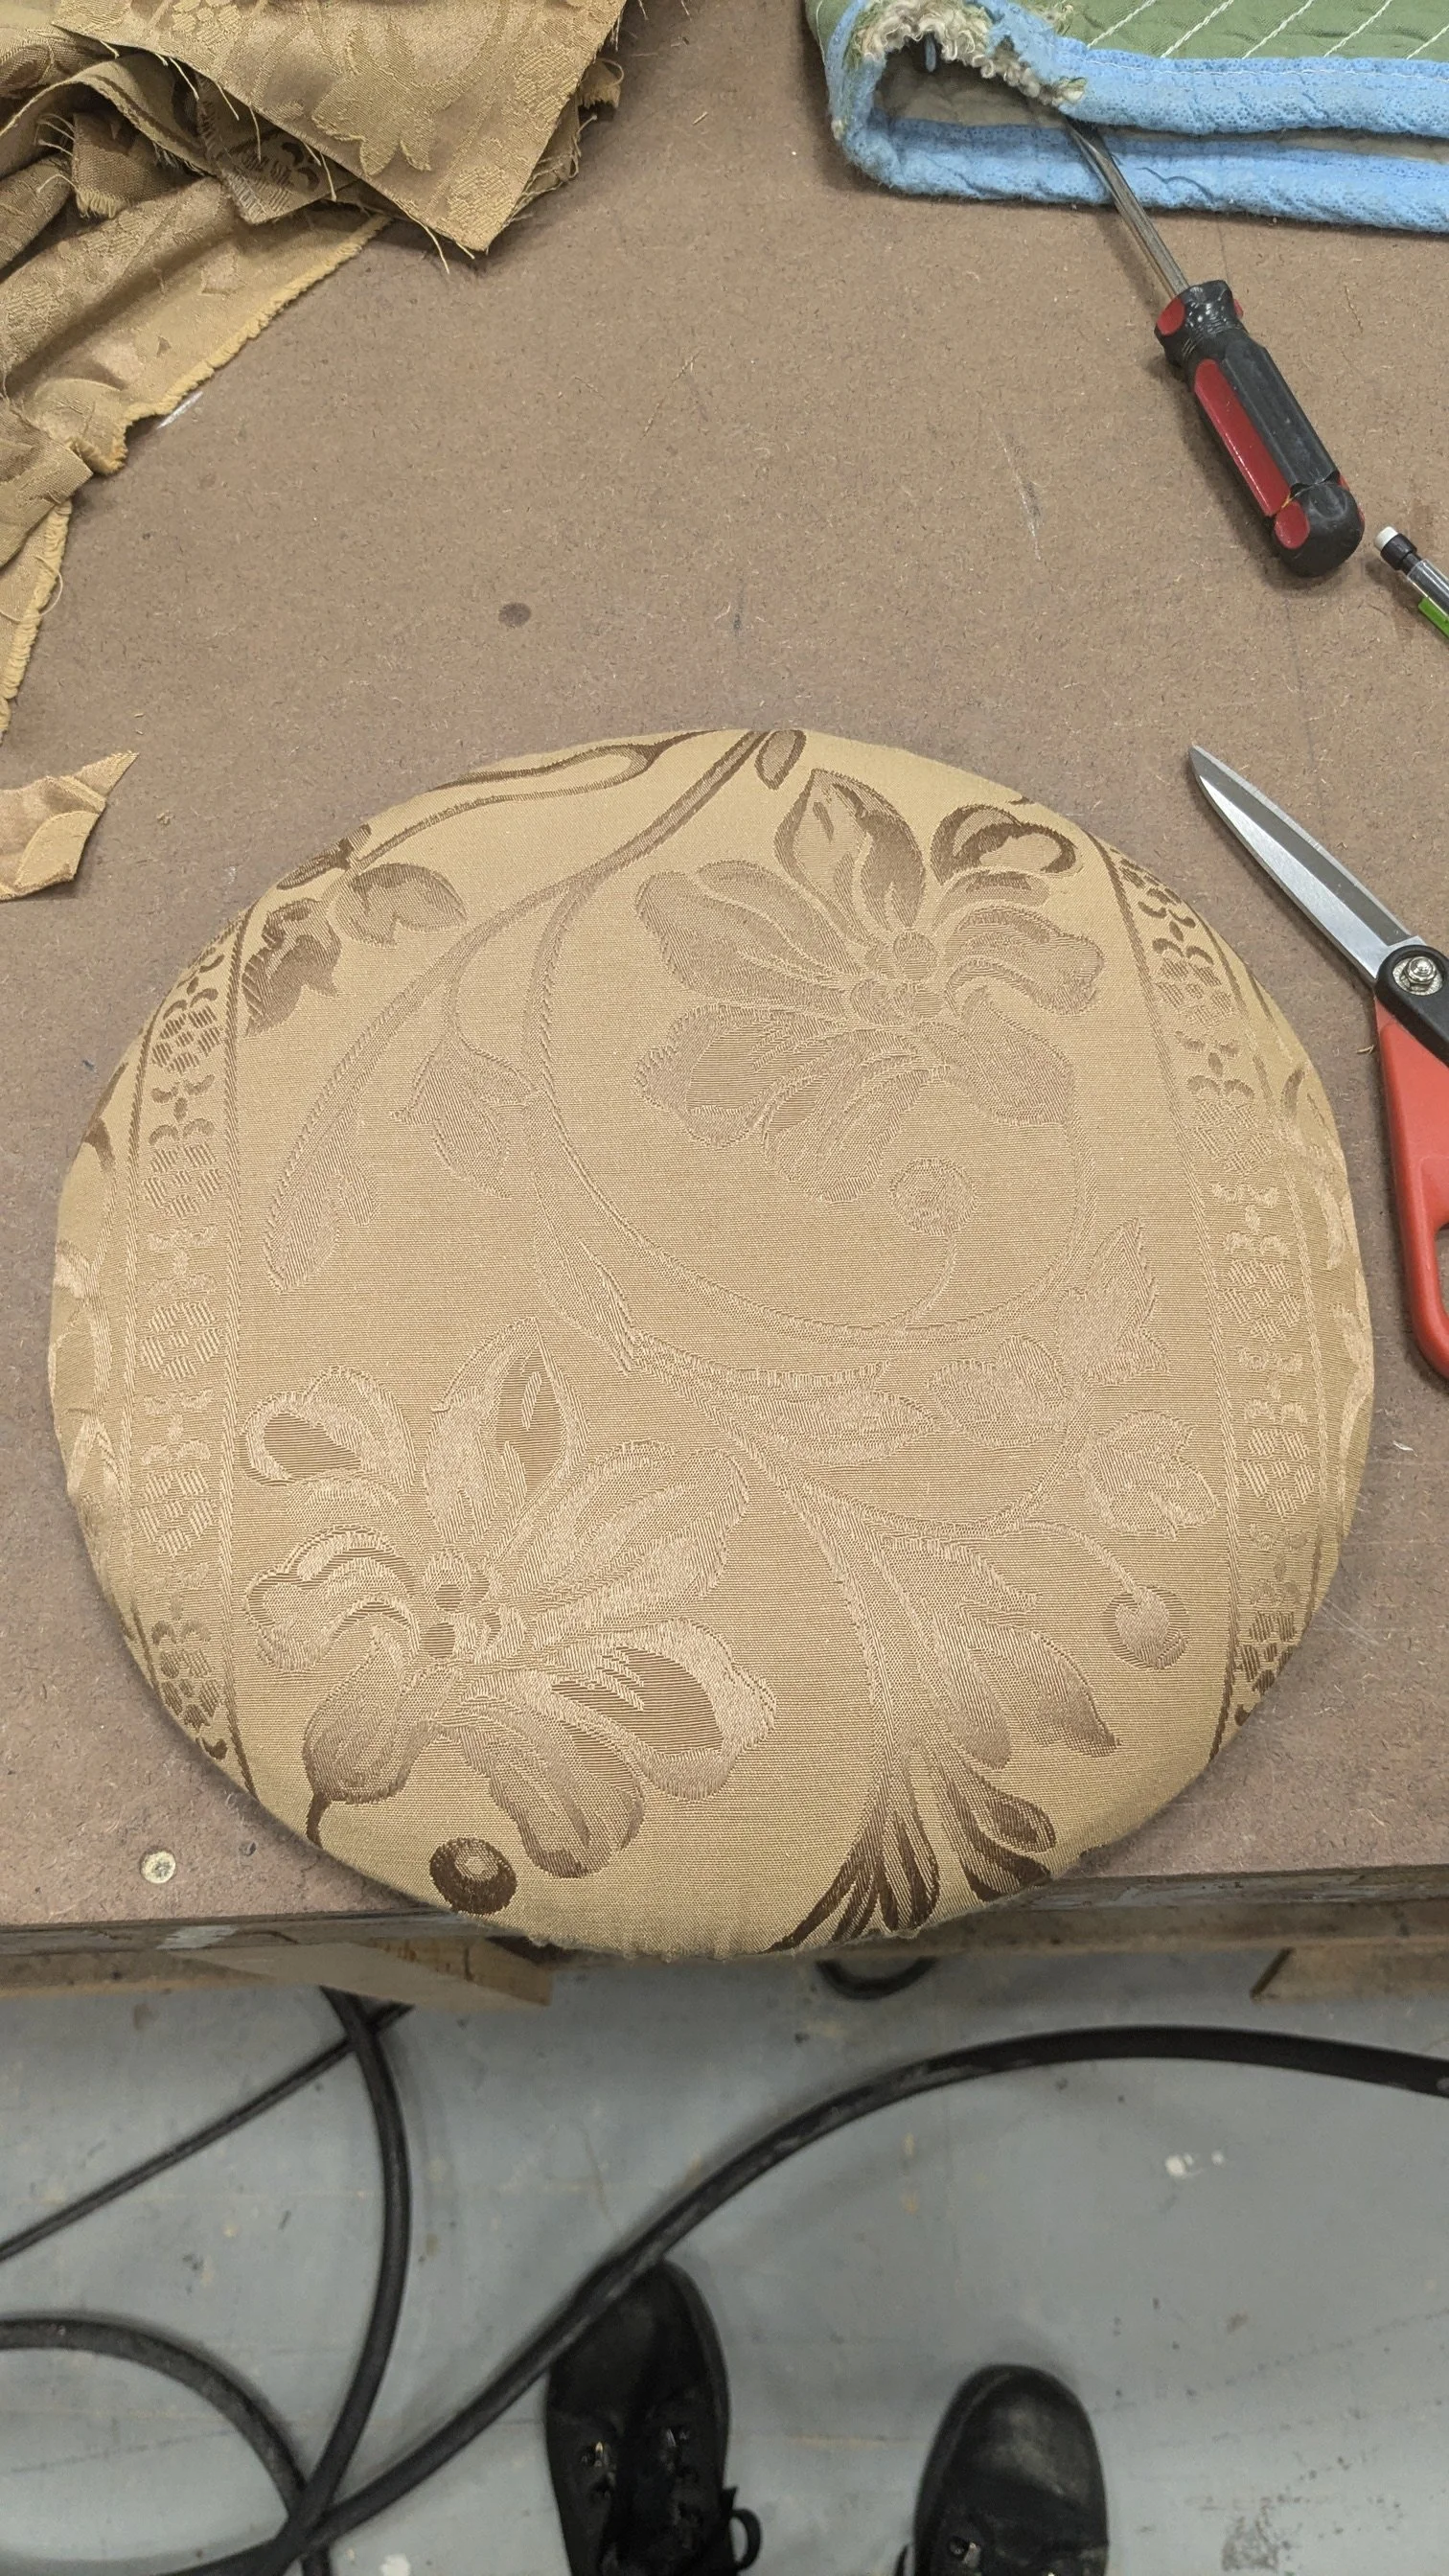
![An image of the Cultural Center.]()
This is the front of the completed backpiece.
-
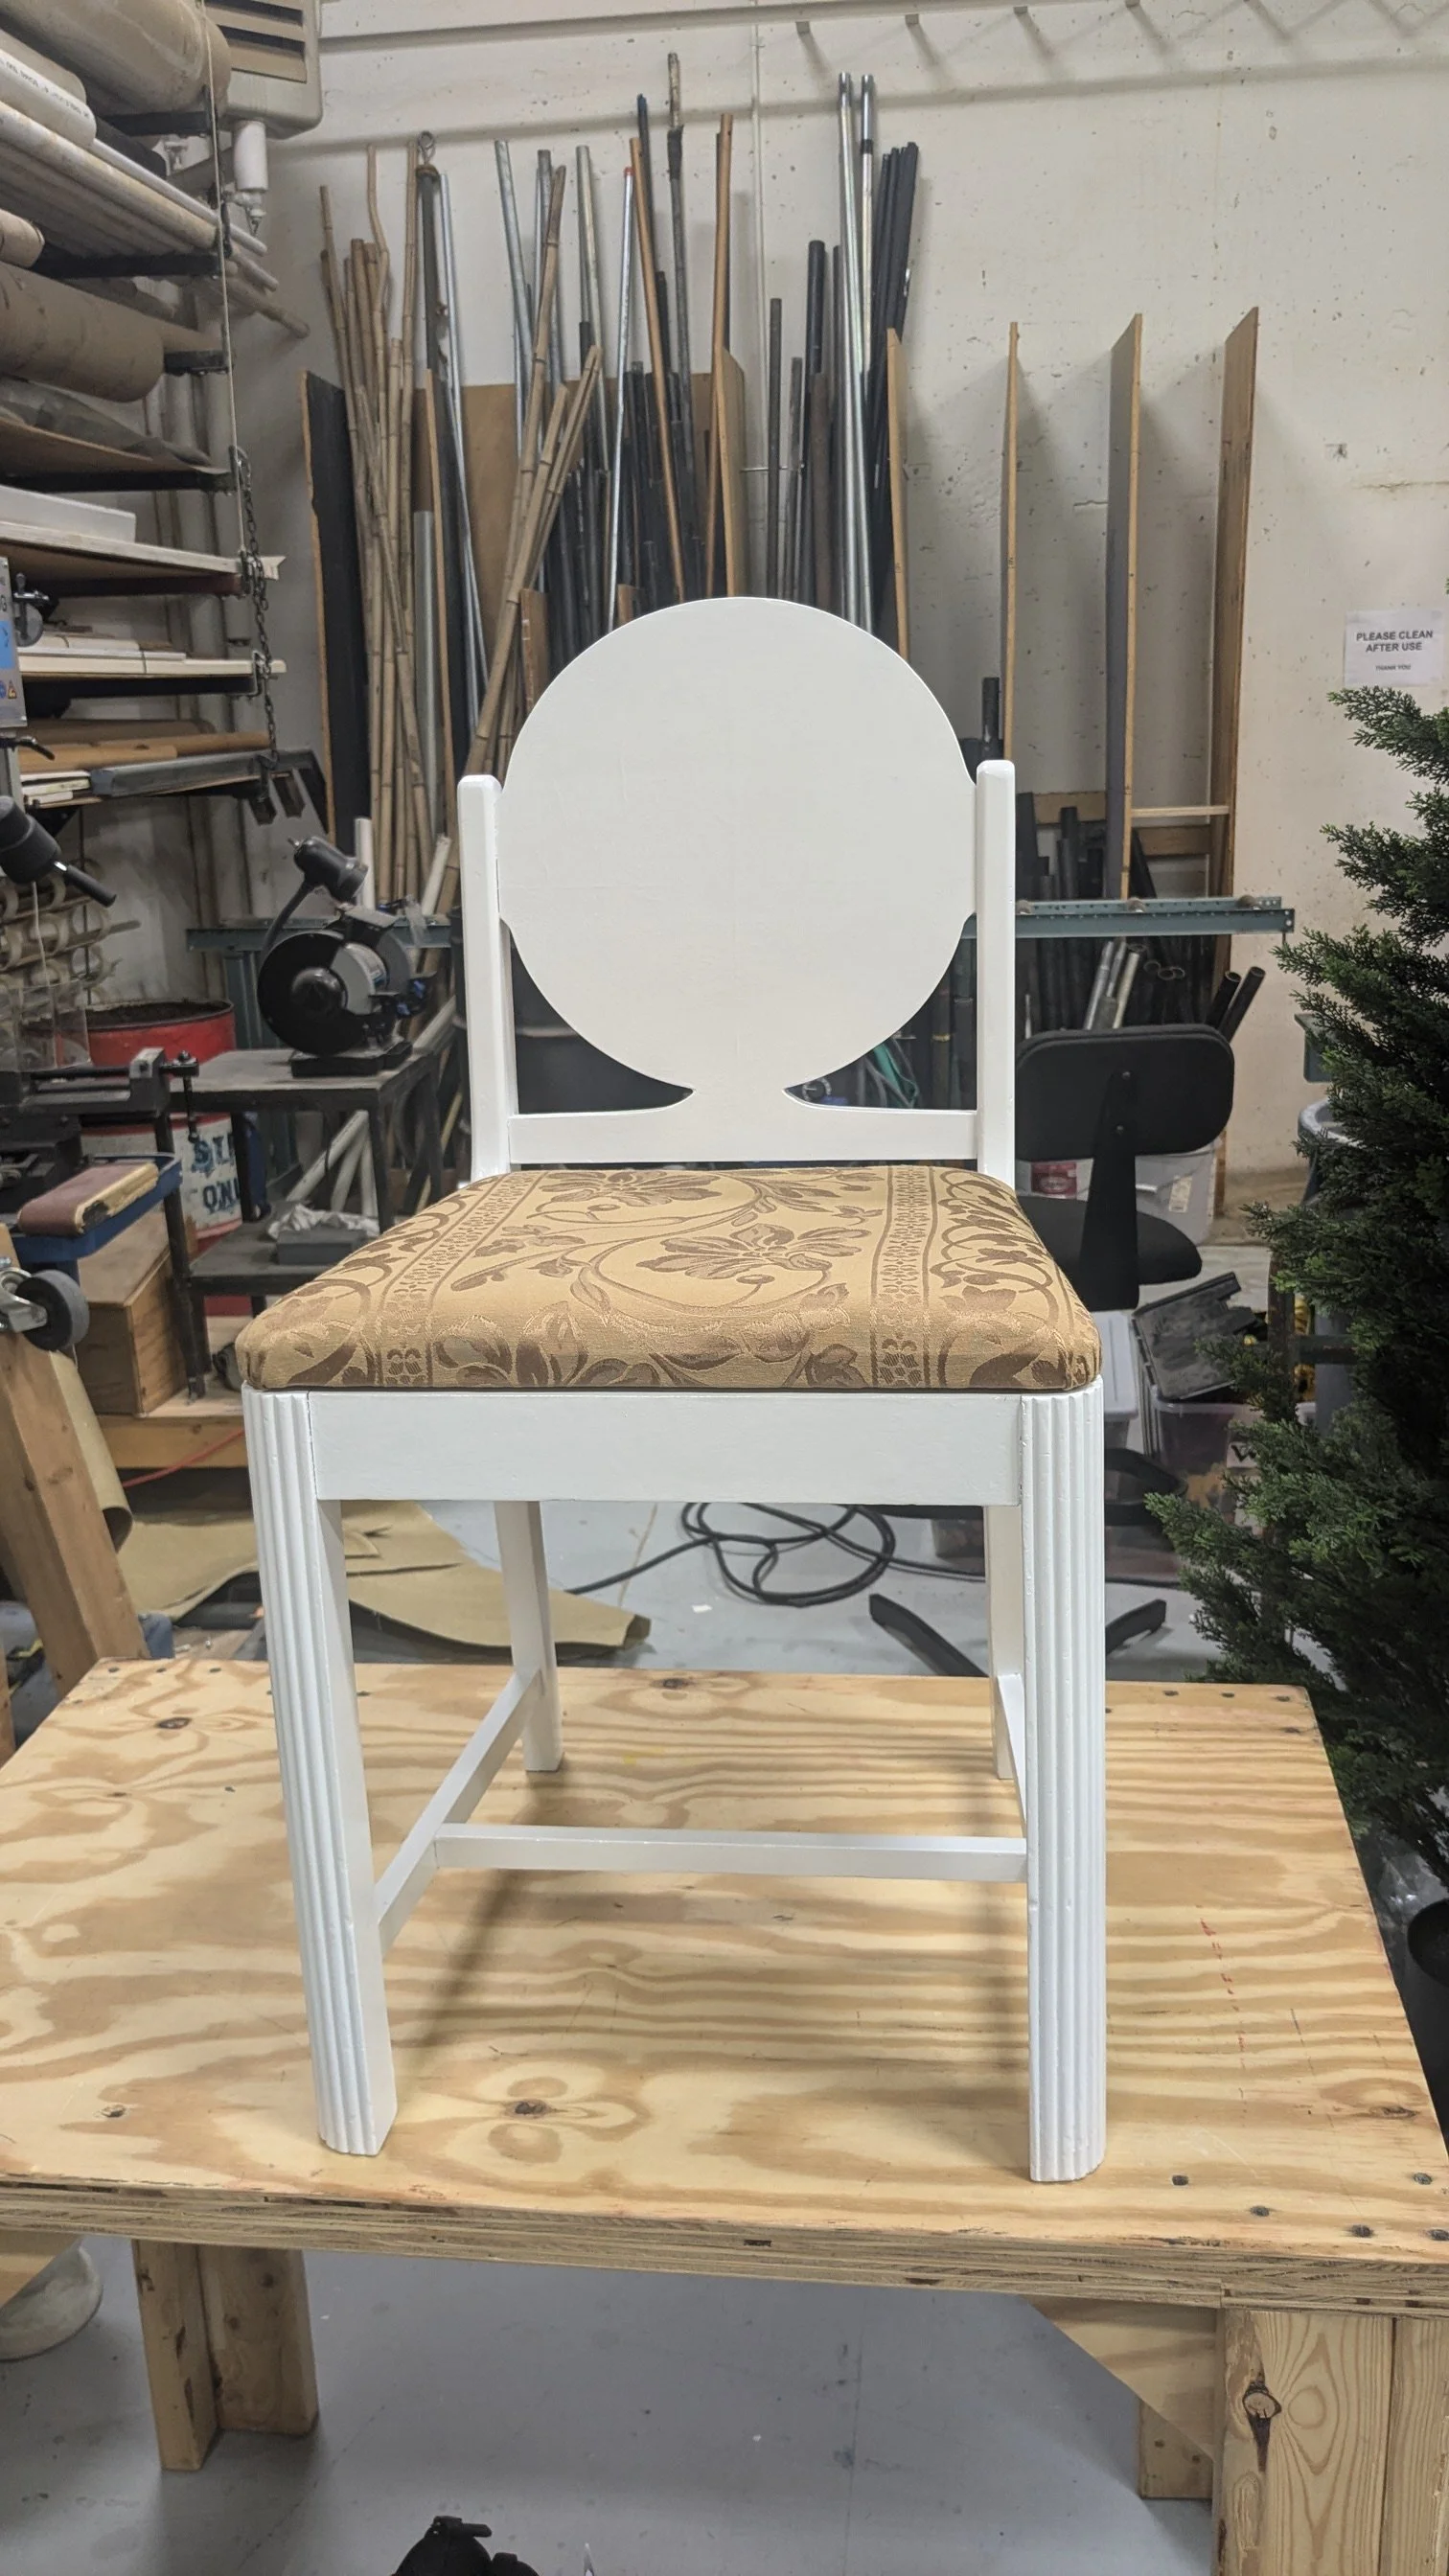
![]()
This is the completed chair from the front
-
![]()
This is the back of the completed chair
Picnic Table
2024
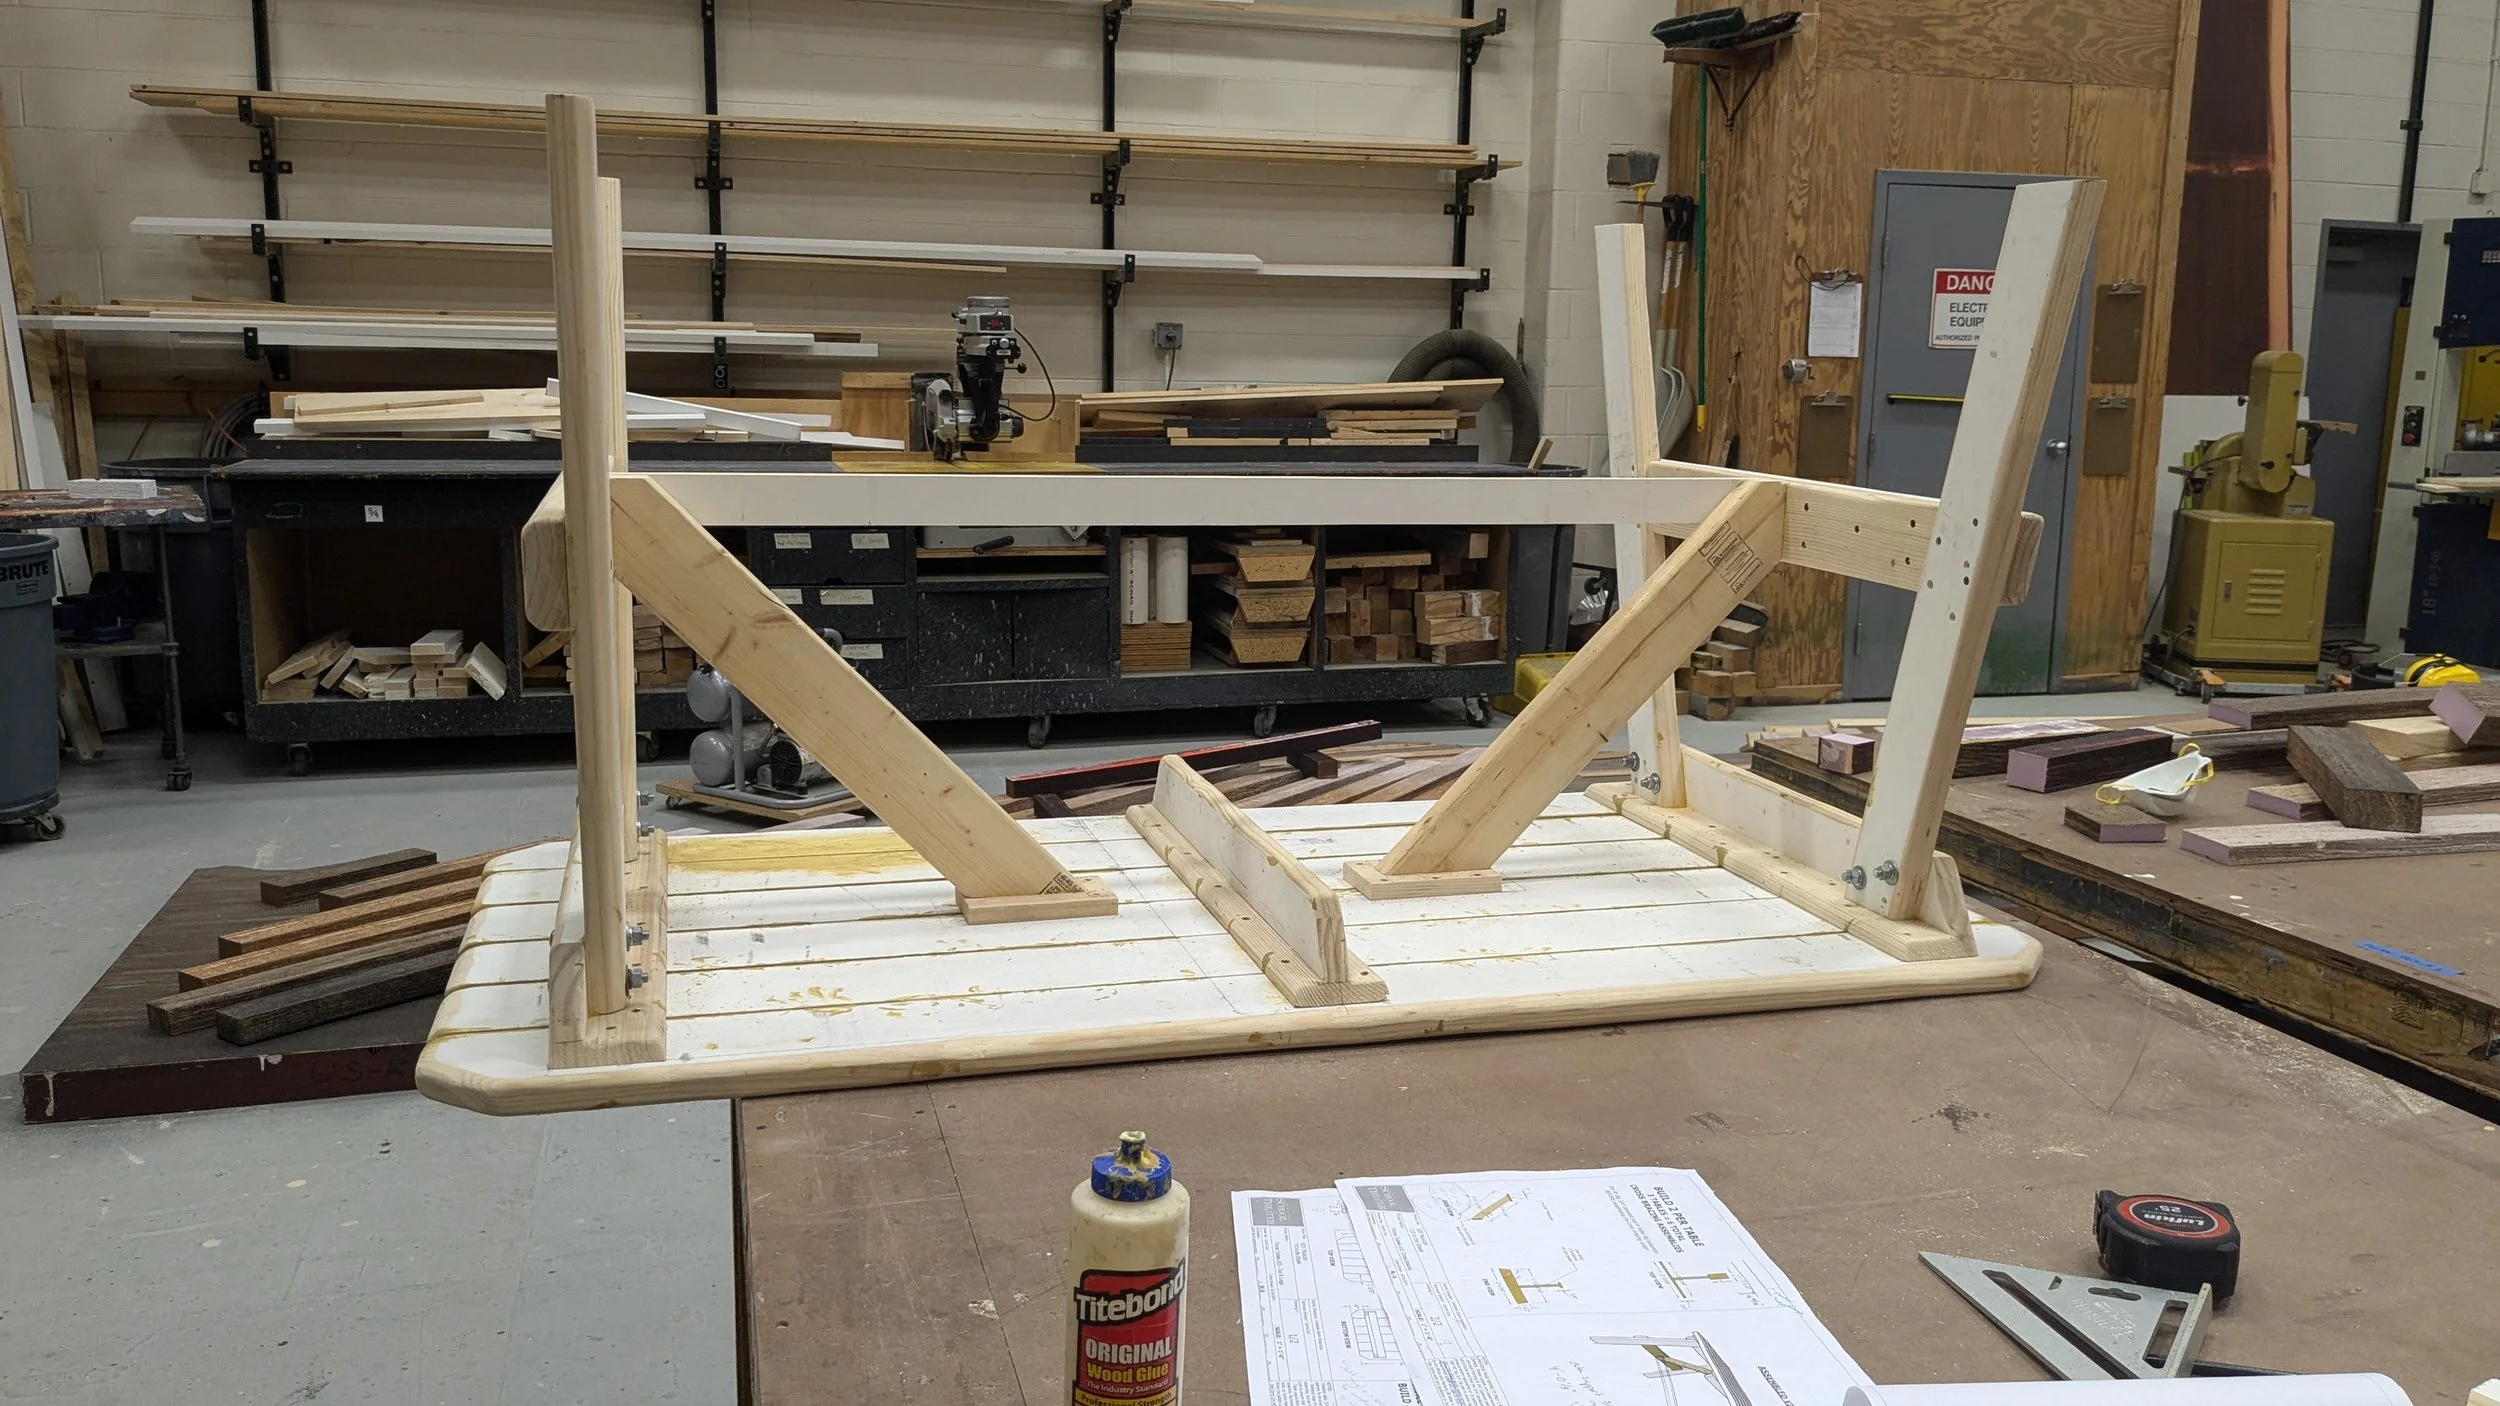
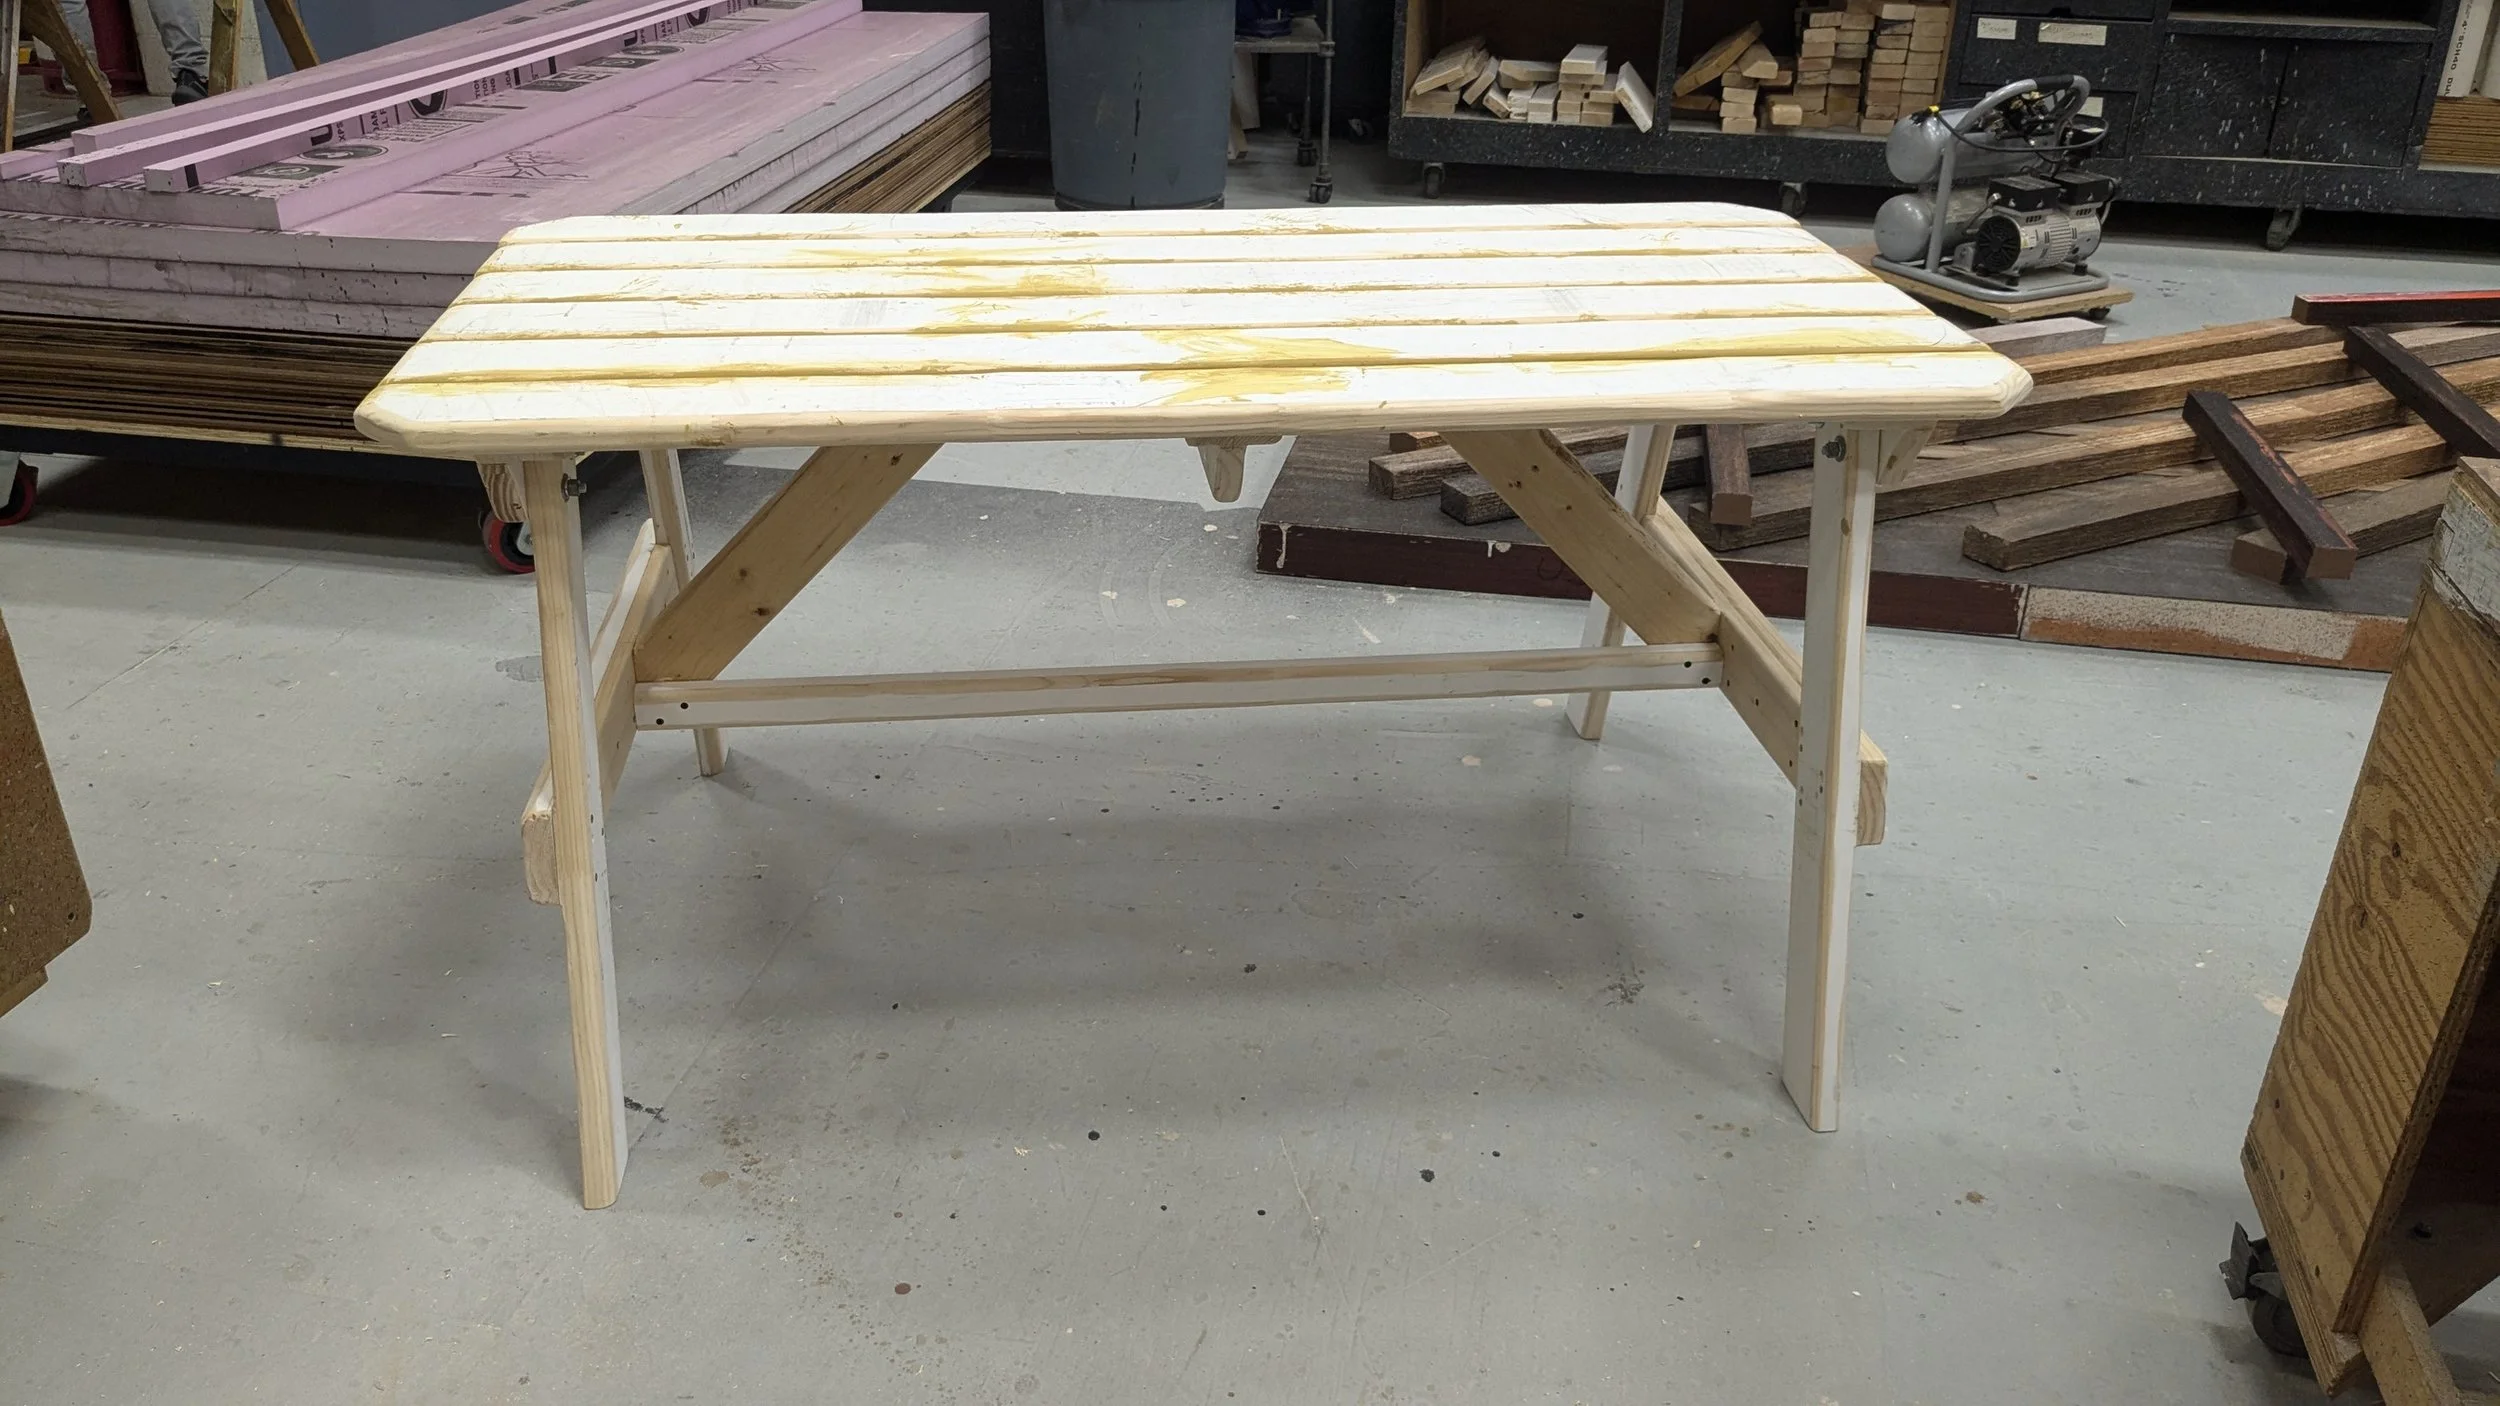
To build this picnic table, I first ripped pieces of 5/4” pine on the table saw and sanded the edges down to assemble into the tabletop, and I used the miter saw at an angle to cut down the corners on the outer slats of the tabletop. We originally used the angle grinder and then palm sander to sand down the edges of the table slats, but soon found that beveling the edges on the table saw (long sides) and miter saw (short sides) before using the palm sander made the process quicker and the product more uniform. I then created three hog’s troughs to assemble the tabletop. I used more 5/4” pine, sanded to smooth edges, to assemble the two sets of legs, which I attached to the outer two hog’s troughs with wood glue and carriage bolts. I then assembled cross bracing using pieces of 1x and 2x4 pine and attached those to the bottom of the table, before adding one last piece of horizontal 5/4” bracing for extra support. I gave the table a base coat of paint, before handing it off to the paint team for wood graining and washes.
-
![An image of the Cultural Center.]()
01
-
![An image of the Cultural Center.]()
02
-
![An image of the Cultural Center.]()
03